هژں链وژ¥:http://blog.csdn.net/k_linux_man/article/details/7023824
转载و³¨وکژه‡؛ه¤„,ن½œè€…ï¼ڑK_Linux_Man
ه¼€هڈ‘ه¹³هڈ°ï¼ڑfarsight s5pc100-a
ه†…و ¸ï¼ڑlinux2.6.29
çژ¯ه¢ƒوگé…چï¼ڑوœ‰هچڑو–‡ن»‹ç»چ
ه¼€هڈ‘çژ¯ه¢ƒï¼ڑUbuntu م€پEclipse
首ه…ˆه¼؛è°ƒن¸€ن¸‹è¦پ点ï¼ڑ
1.ç¼–ه†™android驱هٹ¨و—¶ï¼Œé¦–ه…ˆه…ˆè¦په®Œوˆگlinux驱هٹ¨ï¼Œه› ن¸؛android驱هٹ¨ه…¶ه®وک¯هœ¨linux驱هٹ¨هں؛ç،€ن¹‹ن¸ٹه®Œوˆگن؛†HALه±‚(ç،¬ن»¶وٹ½è±،ه±‚),ه¦‚وœوƒ³è¦پوµ‹è¯•çڑ„è¯ï¼Œè‡ھه·±ن¹ںè¦پç¼–ه†™java程ه؛ڈو¥وµ‹è¯•ن½ çڑ„驱هٹ¨م€‚
2.androidçڑ„و ¹و–‡ن»¶ç³»ç»ںوک¯eclair_2.1版وœ¬م€‚وˆ‘ن¼ڑن¸ٹن¼ هپڑه¥½çڑ„و ¹و–‡ن»¶ç³»ç»ںوڈگن¾›ه¤§ه®¶م€‚è؟™é‡Œè¦پ说çڑ„وک¯ï¼Œandroidه؛•ه±‚ه†…و ¸è؟کوک¯linuxçڑ„ه†…و ¸ï¼Œهڈھوک¯è؟›è،Œن؛†ن¸€ن؛›è£په‰ھم€‚هپڑه¥½çڑ„linuxه†…و ¸é•œهƒڈ,è؟™ن¸ھوˆ‘ن¹ںن¼ڑن¸ٹن¼ ç»™ه¤§ه®¶م€‚androidè‡ھه·±هپڑن؛†ن¸€ه¥—و ¹و–‡ن»¶ç³»ç»ں,è؟™و‰چوک¯androidè‡ھه·±هپڑçڑ„ن¸œè¥؟م€‚androidن؛‹ه®ن¸ٹهڈھوک¯هپڑن؛†ن¸€ه¥—و ¹و–‡ن»¶ç³»ç»ںç½¢ن؛†م€‚
هپ‡è®¾linux驱هٹ¨ه¤§ه®¶éƒ½ه·²ç»ڈهپڑه¥½ن؛†م€‚وˆ‘و؟هگن¸ٹوœ‰ه››ن¸ھçپ¯ï¼Œé€ڑè؟‡ioctlوژ§هˆ¶ه››ن¸ھçپ¯ï¼Œç»™ه®ڑن¸چهگŒçڑ„هڈ‚و•°ï¼Œç‚¹ن؛®ن¸چهگŒçڑ„çپ¯م€‚
linux驱هٹ¨ن»£ç په› ه¹³هڈ°ن¸چهگŒè€Œوœ‰و‰€ن¸چهگŒï¼Œè؟™ه°±ن¸چé»ڈن»£ç پن؛†م€‚
è؟™وک¯وˆ‘وµ‹è¯•linux驱هٹ¨ç¼–ه†™çڑ„驱هٹ¨ï¼Œن»£ç په¦‚ن¸‹ï¼ڑ
-
#include<stdio.h>
-
#include<stdlib.h>
-
#include<unistd.h>
-
#include<fcntl.h>
-
#include<string.h>
-
#include<sys/types.h>
-
#include<sys/stat.h>
-
#include<sys/ioctl.h>
-
#defineLED_ON_IO('k',1)
-
#defineLED_OFF_IO('k',2)
-
intmain()
-
{
-
inti=0;
-
intdev_fd;
-
dev_fd=open("/dev/led",O_RDWR);
-
if(dev_fd==-1){
-
printf("Cann'topenfile/dev/led\n");
-
exit(1);
-
}
-
while(1)
-
{
-
ioctl(dev_fd,LED_ON,1);
-
sleep(1);
-
ioctl(dev_fd,LED_OFF,1);
-
sleep(1);
-
ioctl(dev_fd,LED_ON,2);
-
sleep(1);
-
ioctl(dev_fd,LED_OFF,2);
-
sleep(1);
-
ioctl(dev_fd,LED_ON,3);
-
sleep(1);
-
ioctl(dev_fd,LED_OFF,3);
-
sleep(1);
-
ioctl(dev_fd,LED_ON,4);
-
sleep(1);
-
ioctl(dev_fd,LED_OFF,4);
-
sleep(1);
-
-
}
-
return0;
-
}
ن¸‹é¢ه¼€ه§‹وٹٹlinux驱هٹ¨ه°پ装وˆگandroid驱هٹ¨م€‚
首ه…ˆن»‹ç»چن¸€ن¸‹android驱هٹ¨ç”¨هˆ°çڑ„ن¸‰ن¸ھé‡چè¦پçڑ„结و„ن½“,
struct hw_module_t;
struct hw_device_t;
struct hw_module_methods_t;
androidو؛گç پ里é¢ç»“و„ن½“çڑ„ه£°وکژ
-
typedefstructhw_module_t{
-
-
uint32_ttag;
-
-
uint16_tversion_major;
-
-
uint16_tversion_minor;
-
-
constchar*id;
-
-
constchar*name;
-
-
constchar*author;
-
-
consthw_module_methods_t*methods;
-
-
void*dso;
-
-
uint32_treserved[32-7];
-
-
}hw_module_t;
-
typedefstructhw_device_t{
-
-
uint32_ttag;
-
-
uint32_tversion;
-
-
structhw_module_t*module;
-
-
uint32_treserved[12];
-
-
int(*close)(structhw_device_t*device);
-
-
}hw_device_t;
-
typedefstructhw_module_methods_t{
-
-
int(*open)(conststructhw_module_t*module,constchar*id,
-
-
structhw_device_t**device);
-
-
}hw_module_methods_t;
وˆ‘ن»¬ç»ڈه¸¸ن¼ڑ用هˆ°è؟™ن¸‰ن¸ھ结و„ن½“م€‚
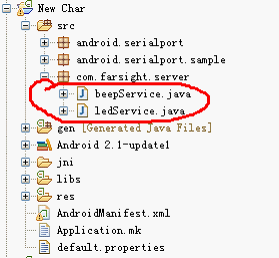
android驱هٹ¨ç›®ه½•ç»“و„:
led
|--- hal
||----jni
||----- Android.mk
| |----com_farsgiht_server_ledServer.cpp
||----stub
||---- include
|||-----led.h
||-----module
||-----Android.mk
||-----led.c
|--- linux_drv
首ه…ˆوˆ‘ن»¬è¦پç¼–ه†™ن¸€ن¸ھstub(ن»£çگ†ï¼‰ï¼Œن»£çگ†çڑ„و„ڈو€وک¯ï¼Œé’ˆه¯¹ن½ و‰€ç‰¹وœ‰çڑ„设ه¤‡ï¼Œن½ و‰¾ن¸€ن¸ھن»£çگ†ن؛؛ه°±هڈ¯ن»¥ه¸®ن½ ه®Œوˆگ,ه®ƒوک¯و“چن½œlinux驱هٹ¨çڑ„第ن¸€ه±‚م€‚
ç¼–ه†™ه¤´و–‡ن»¶ï¼Œهگچه—led.h
ن»£ç په¦‚ن¸‹;
-
#include<hardware/hardware.h>
-
#include<fcntl.h>
-
#include<errno.h>
-
#include<cutils/log.h>
-
#include<cutils/atomic.h>
-
-
-
#defineLED_HARDWARE_MODULE_ID"led"
-
-
-
structled_module_t{
-
structhw_module_tcommon;
-
};
-
-
structled_control_device_t{
-
structhw_device_tcommon;
-
-
int(*set_on)(structled_control_device_t*dev,intarg);
-
int(*set_off)(structled_control_device_t*dev,intarg);
-
};
-
-
-
structled_control_context_t{
-
structled_control_device_tdevice;
-
};
struct hw_module_t sturct hw_device_t è؟™ن¸¤ن¸ھ结و„ن½“ن¸چ能直وژ¥ن½؟用,و‰€ن»¥è؟›è،Œن؛†ن¸€ن¸‹ه°پ装(继و‰؟)م€‚
led_module_t 继و‰؟ hw_module_t
led_control_device_t 继و‰؟ hw_device_t
led_control_context_t 继و‰؟ led_control_device_t
هœ¨led_control_device_t 结و„ن½“وœ‰ه‡½و•°وŒ‡é’ˆçڑ„ه£°وکژ,ه› ن¸؛هگژé¢ن»£ç پن¸ن¼ڑç»™è؟™ن؛›ه‡½و•°وŒ‡é’ˆèµ‹ه€¼
ç¼–ه†™led.c
ن»£ç په¦‚ن¸‹ï¼ڑ
-
#defineLOG_TAG"LedStub"
-
#include<hardware/hardware.h>
-
#include<fcntl.h>
-
#include<errno.h>
-
#include<cutils/log.h>
-
#include<cutils/atomic.h>
-
#include<sys/ioctl.h>
-
#include"../include/led.h"
-
-
-
#defineLED_ON_IO('k',1)
-
#defineLED_OFF_IO('k',2)
-
-
intfd;
-
-
staticintled_set_on(structled_control_device_t*dev,intarg)
-
{
-
LOGI("led_set_on");
-
ioctl(fd,LED_ON,arg);
-
return0;
-
}
-
-
staticintled_set_off(structled_control_device_t*dev,intarg)
-
{
-
LOGI("led_set_off");
-
ioctl(fd,LED_OFF,arg);
-
return0;
-
}
-
-
staticintled_device_close(structhw_device_t*device)
-
{
-
structled_control_context_t*context=(structled_control_context_t*)device;
-
if(context)free(context);
-
close(fd);
-
return0;
-
}
-
-
-
staticintled_device_open(conststructhw_module_t*module,constchar*name,
-
structhw_device_t**device)
-
{
-
structled_control_context_t*context;
-
LOGD("led_device_open");
-
context=(structled_control_context_t*)malloc(sizeof(*context));
-
memset(context,0,sizeof(*context));
-
-
context->device.common.tag=HARDWARE_DEVICE_TAG;
-
context->device.common.version=0;
-
context->device.common.module=module;
-
context->device.common.close=led_device_close;
-
-
context->device.set_on=led_set_on;
-
context->device.set_off=led_set_off;
-
-
*device=(structhw_device_t*)&(context->device);
-
-
if((fd=open("/dev/led",O_RDWR))==-1)
-
{
-
LOGI("ERROR:open");
-
}else{
-
LOGI("openleddeviceok\n");
-
}
-
-
return0;
-
}
-
-
staticstructhw_module_methods_tled_module_methods={
-
open:led_device_open
-
};
-
-
-
conststructled_module_tHAL_MODULE_INFO_SYM={
-
common:{
-
tag:HARDWARE_MODULE_TAG,
-
version_major:1,
-
version_minor:0,
-
id:LED_HARDWARE_MODULE_ID,
-
name:"led_stub",
-
author:"K_Linux_Man",
-
methods:&led_module_methods,
-
},
-
};
首ه…ˆه…ˆçœ‹ struct led_module_t HAL_MODULE_INFO_SYMم€‚è؟™ن¸ھ结و„ن½“çڑ„هگچه—ه؟…é،»وک¯è؟™ن¸ھهگچه—,هگ¦هˆ™ç³»ç»ںو— و³•و‰¾هˆ°led_module_tè؟™ن¸ھ结و„ن½“م€‚
然هگژه¯¹led_module_t 里çڑ„وˆگه‘کhw_module_t结و„ن½“赋ه€¼م€‚وœ€ه…³é”®çڑ„ن¸؛idه’Œmethodsن¸¤ن¸ھوˆگه‘کçڑ„赋ه€¼ï¼Œidه؟…é،»è¦پ赋ه€¼ï¼Œه› ن¸؛هگژé¢وœ‰ن¸ھه‡½و•°è¦پو‰¾هˆ°hw_module_tه°±وک¯é€ڑè؟‡idهڈ·هژ»و‰¾çڑ„م€‚ methods被赋ه€¼ن¹‹هگژ,ن¸ٹه±‚çڑ„jniو‰چ能هژ»è°ƒç”¨م€‚
وژ¥ç€çœ‹methods 结و„ن½“里çڑ„وˆگه‘که°±ن¸€ن¸ھ,openه‡½و•°وŒ‡é’ˆï¼Œه¯¹è؟™ن¸ھه‡½و•°وŒ‡é’ˆè؟›è،Œن؛†èµ‹ه€¼ï¼Œèµ‹ن؛†led_device_openه‡½و•°ï¼Œè؟™ن¸ھه‡½و•°ه®çژ°çڑ„ن¸»è¦په°±وک¯هˆ†é…چled_control_context_t结و„ن½“ç©؛间,ه¹¶ه¯¹وˆگه‘کè؟›è،Œèµ‹ه€¼م€‚و³¨و„ڈhw_device_t 里çڑ„وˆگه‘کmoduleم€پcloseه؟…é،»èµ‹ه€¼م€‚
ه‡½و•°وŒ‡é’ˆèµ‹ه€¼ï¼ڑ
context->device.set_on = led_set_on;
context->device.set_off = led_set_off;
ن¸‹é¢è؟™هڈ¥è¯çڑ„用و„ڈوک¯ï¼Œن¼ è؟›و¥çڑ„deviceوŒ‡é’ˆèµ‹ن؛ˆو–°çڑ„ه€¼ï¼Œهڈھè¦پ调用è؟™ن¸ھه‡½و•°ï¼Œن¼ è؟›و¥çڑ„ن؛Œç؛§وŒ‡é’ˆو‰€وŒ‡هگ‘çڑ„ن¸€ç؛§وŒ‡é’ˆه°±وœ‰ه€¼ن؛†ï¼ˆن؛Œç؛§وŒ‡é’ˆو”¹هڈکن؛†ن¸€ç؛§وŒ‡é’ˆçڑ„وŒ‡هگ‘,ن½ هڈ¯ن»¥çœ‹وˆ‘ه†™çڑ„ int*p ه’Œ int **p هچڑو–‡ï¼‰م€‚
*device = (struct hw_device_t *)&(context->device);
وژ¥ç€ه°±وک¯و‰“ه¼€è®¾ه¤‡و–‡ن»¶,ه¾—هˆ°fd
led_set_on();里é¢è°ƒç”¨ioctl;
led_set_off();里é¢è°ƒç”¨ioctl;
وژ¥ن¸‹و¥ه†™jniن؛†م€‚م€‚com_farsight_server_ledServer.cppو–‡ن»¶
و–‡ن»¶ن»£ç پï¼ڑ
-
#defineLOG_TAG"ledService"
-
-
#include"utils/Log.h"
-
#include<stdlib.h>
-
#include<string.h>
-
#include<unistd.h>
-
#include<assert.h>
-
#include<jni.h>
-
#include"../stub/include/led.h"
-
-
-
staticled_control_device_t*sLedDevice=NULL;
-
-
-
staticjintled_set_on(JNIEnv*env,jobjectthiz,jintarg)
-
{
-
if(sLedDevice){
-
LOGI("led_set_on");
-
sLedDevice->set_on(sLedDevice,(int)arg);
-
}else{
-
LOGI("sLedDeviceisNULL");
-
};
-
return0;
-
}
-
-
staticjintled_set_off(JNIEnv*env,jobjectthiz,jintarg)
-
{
-
if(sLedDevice){
-
LOGI("led_set_off");
-
sLedDevice->set_off(sLedDevice,(int)arg);
-
}else{
-
LOGI("sLedDeviceisnull");
-
}
-
return0;
-
}
-
-
-
-
staticinlineintled_control_open(conststructhw_module_t*module,
-
structled_control_device_t**device)
-
{
-
LOGI("led_control_open");
-
returnmodule->methods->open(module,LED_HARDWARE_MODULE_ID,
-
(structhw_device_t**)device);
-
}
-
-
-
staticjintled_init(JNIEnv*env,jclassclazz)
-
{
-
led_module_tconst*module;
-
LOGI("led_init");
-
-
if(hw_get_module(LED_HARDWARE_MODULE_ID,(consthw_module_t**)&module)==0){
-
LOGI("getModuleOK");
-
if(led_control_open(&module->common,&sLedDevice)!=0){
-
LOGI("led_initerror");
-
return-1;
-
}
-
}
-
LOGI("led_initsuccess");
-
return0;
-
-
}
-
-
-
staticconstJNINativeMethodgMethods[]={
-
{"_init","()Z",(void*)led_init},
-
{"_set_on","(I)I",(void*)led_set_on},
-
{"_set_off","(I)I",(void*)led_set_off},
-
};
-
-
staticintregisterMethods(JNIEnv*env){
-
staticconstchar*constkClassName=
-
"com/farsight/server/ledService";
-
jclassclazz;
-
clazz=env->FindClass(kClassName);
-
if(clazz==NULL){
-
LOGE("Can'tfindclass%s\n",kClassName);
-
return-1;
-
}
-
-
if(env->RegisterNatives(clazz,gMethods,
-
sizeof(gMethods)/sizeof(gMethods[0]))!=JNI_OK)
-
{
-
LOGE("failedregisteringmethodsfor%s\n",kClassName);
-
return-1;
-
}
-
-
return0;
-
}
-
-
-
jintJNI_OnLoad(JavaVM*vm,void*reserved){
-
JNIEnv*env=NULL;
-
jintresult=-1;
-
LOGI("JNI_onLoad");
-
-
if(vm->GetEnv((void**)&env,JNI_VERSION_1_4)!=JNI_OK){
-
LOGE("ERROR:jni_onload()\n");
-
gotofail;
-
}
-
-
assert(env!=NULL);
-
if(registerMethods(env)!=0){
-
LOGE("ERROR:registerMethod()\n");
-
gotofail;
-
}
-
-
result=JNI_VERSION_1_4;
-
-
fail:
-
returnresult;
-
}
هœ¨jni里首ه…ˆهٹ è½½jniه؛“و–‡ن»¶çڑ„و—¶ه€™ه…ˆè¦پ调用JNI_OnLoadه‡½و•°ï¼Œé€ڑè؟‡ç³»ç»ںه‡½و•°GetEnv让envوŒ‡é’ˆèژ·ه¾—وœ‰و•ˆçڑ„ه€¼م€‚然هگژوژ¥ç€è°ƒç”¨registerMethodsه‡½و•°ï¼Œè؟™ن¸ھه‡½و•°وک¯è‡ھه·±ه®ڑن¹‰ن¸€ن¸ھه‡½و•°م€‚
static const char * const kClassName = "com/farsight/server/ledService"; ç±»هگچن¸ژEclipseن¸‹ه¼€هڈ‘ه¯¹ه؛”çڑ„هŒ…ن¸€è‡´م€‚ن¸چè؟‡ç‚¹وچ¢وˆگن؛†ن¸‹هˆ’ç؛؟م€‚
然هگژو‰¾هˆ°ه¯¹ه؛”çڑ„类,وژ¥ç€ه°±وک¯هگ‘ç³»ç»ںو³¨ه†ŒNativeه‡½و•°ï¼ˆNative Interfaceهچ³وœ¬هœ°وژ¥هڈ£ه‡½و•°ï¼‰ï¼Œه‡½و•°هˆ—è،¨gMethods里 _initوک¯ن¸ٹه±‚frameworkهژ»هٹ è½½ه؛“و—¶ه€™è°ƒç”¨çڑ„,ه½“ن¸ٹه±‚调用_initو—¶ï¼Œن¸ژن¹‹ه¯¹ه؛”调用çڑ„ه‡½و•°ه°±وک¯led_init, ()Zçڑ„و„ڈو€وک¯ه‡½و•°led_initهڈ‚و•°ن¸؛ç©؛,è؟”ه›ن¸؛ç©؛م€‚è؟™é‡Œه…¶ه®ه°±وک¯هپڑن؛†ن¸€ن¸ھه‡½و•°çڑ„وک ه°„,ن¸ٹه±‚用çڑ„javaه‡½و•°ï¼Œهœ¨è؟™é‡Œن¸ژن¹‹ه¯¹ه؛”وˆگc ه‡½و•°م€‚
هگŒçگ†ï¼Œه…¶ن½™çڑ„_set_on _set_offه°±ن¸چه؟…èµکè؟°م€‚
هœ¨è°ƒç”¨led_init()ه‡½و•°و—¶ï¼Œç³»ç»ںوک¯ه¦‚ن½•و‰¾هˆ°ن¸ژن¹‹ه¯¹ه؛”çڑ„stubçڑ„ه‘¢ï¼ˆن¹ںه°±وک¯ه¦‚ن½•و‰¾هˆ°hw_module_t结و„ن½“çڑ„ه‘¢ï¼‰ï¼ںن¸»è¦پçڑ„ه‡½و•°ه°±وک¯hw_get_moduleè؟™ن¸ھه‡½و•°وک¯é€ڑè؟‡ç¬¬ن¸€ن¸ھهڈ‚و•°IDهڈ·ï¼Œو‰¾هˆ°ç³»ç»ں里ه·²ç»ڈهکهœ¨çڑ„ن¸ژن¹‹ه¯¹ه؛”idهڈ·çڑ„stub(هچ³led_module_t HAL_MODULE_INFO_SYM 结و„ن½“هڈکé‡ڈ),第ن؛Œن¸ھهڈ‚و•°ه°±ن¼ è؟›هژ»çڑ„ن؛Œç؛§وŒ‡é’ˆï¼Œè®©moduleèژ·هڈ–وœ‰و•ˆçڑ„ه€¼ï¼Œ
وژ¥ç€è°ƒç”¨ led_control_open,è؟™ن¸ھه‡½و•°وک¯ه†…èپ”ه‡½و•°ï¼Œه‡½و•°é‡Œé¢وژ¥ç€è°ƒç”¨ن؛†HAL_MODULE_INFO_SYM 里çڑ„methods,methods里ه°±ن¸€ن¸ھوˆگه‘کopen,ه…¶ه®ه‘¢ه°±وک¯è°ƒç”¨ن؛†led.c(stub)çڑ„led_device_openه‡½و•°ï¼ŒsLedDeviceوŒ‡é’ˆوک¯ن¸€ن¸ھه…¨ه±€هڈکé‡ڈ,ç»ڈè؟‡è؟™ن¸ھه‡½و•°çڑ„调用,sLedDeviceه°±èژ·ه¾—ن؛†hw_deive_tçڑ„هœ°ه€ï¼ˆsLedDeviceوŒ‡هگ‘ن؛†hw_device_t)م€‚
وœ¬و¥ن¸€ن¸ھوŒ‡é’ˆو²،وœ‰ه€¼ï¼Œن½†وک¯é€ڑè؟‡ن¼ è؟›هژ»ن؛Œç؛§وŒ‡é’ˆï¼Œه°±èƒ½è®©هژںو¥ن¸؛ç©؛çڑ„وŒ‡é’ˆèژ·ه¾—وœ‰و•ˆçڑ„ه€¼ï¼Œن½ هڈ¯ن»¥هڈ‚考وˆ‘ه†™çڑ„هچڑو–‡ int*pه’Œ int **p,ه¯¹ن½ ن»¬çگ†è§£ن؛Œç؛§وŒ‡é’ˆو”¹هڈکن¸€ç؛§وŒ‡é’ˆوŒ‡هگ‘وœ‰ه¸®هٹ©م€‚و—¢ç„¶هœ¨jniه±‚能ه¤ںèژ·ه¾—stub里çڑ„hw_module_t ه’Œ hw_device_t,那ن¹ˆهژ»è°ƒç”¨stub里çڑ„ه‡½و•°ن¹ںه°±ن¸چوک¯é—®é¢کن؛†م€‚
وژ¥ن¸‹و¥ه°±وک¯هژ»ه®çژ°frameworkه±‚ن؛†ï¼Œframewه±‚里çڑ„serviceهژ»è°ƒç”¨jniçڑ„م€‚frameworkه±‚里çڑ„serviceوک¯هœ¨eclipseن¸‹ه¼€هڈ‘çڑ„م€‚
و–‡ن»¶هگچï¼ڑledService.java
ن»£ç پï¼ڑ
-
packagecom.farsight.server;
-
-
importandroid.util.Log;
-
-
publicclassledService{
-
static{
-
Log.i("ledService","LoadNativeserviceLIB");
-
System.loadLibrary("led_runtime");
-
}
-
publicledService(){
-
Log.i("JavaService","doinitNativeCall");
-
_init();
-
}
-
publicbooleanset_on(intarg){
-
if(0==_set_on(arg)){
-
returntrue;
-
}else{
-
returnfalse;
-
}
-
}
-
-
publicbooleanset_off(intarg){
-
if(0==_set_off(arg)){
-
returntrue;
-
}else{
-
returnfalse;
-
}
-
}
-
-
privatestaticnativeboolean_init();
-
privatestaticnativeint_set_on(intarg);
-
privatestaticnativeint_set_off(intarg);
-
}
private static native boolean _init();
private static native int _set_on(int arg);
private static native int _set_off(int arg);
è؟™é‡Œçڑ„ن¸‰ن¸ھه‡½و•°ï¼Œه°±وک¯هœ¨jni里ه£°وکژçڑ„native interfaceوژ¥هڈ£ه‡½و•°م€‚
ه½“ه£°وکژن¸€ن¸ھledServiceçڑ„ه¯¹è±،و—¶ï¼Œstatic里çڑ„ه‡½و•°ه؛“ن¼ڑهٹ 载,é»ک认çڑ„è·¯ه¾„ه°±وک¯هژ»هٹ è½½/system/libن¸‹ن¸ژن¹‹ه¯¹ه؛”çڑ„ه؛“,ه¼؛è°ƒن¸€ç‚¹ه°±وک¯ï¼Œled_runtimeçœپهژ»ن؛†ه‰چé¢çڑ„libه’Œهگژç¼€.soم€‚
è؟™و ·ï¼Œوˆ‘ن»¬هژ»è°ƒç”¨jniçڑ„و—¶ه€™ه°±èƒ½وˆگهٹں,هگ¦هˆ™ن¼ڑه¤±è´¥م€‚
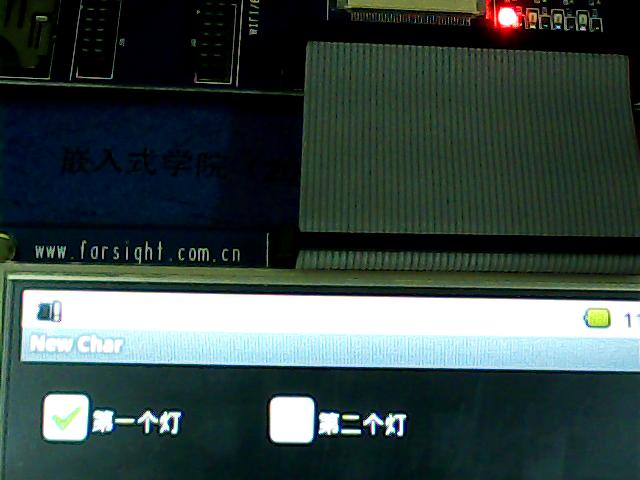
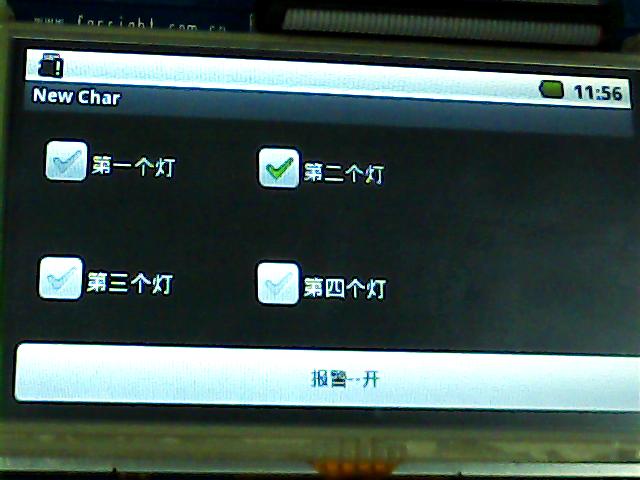
ه…¶ن½™çڑ„ه°±وک¯هœ¨ه؛”用程ه؛ڈ里ه£°وکژن¸€ن¸ھledServiceه¯¹è±،,然هگژ调用ه¯¹è±،里çڑ„set_on ه’Œ set_off ه°±هڈ¯ن»¥ن؛†م€‚هڈ¯ن»¥è‡ھه·±ه†™ن¸€ن¸ھه؛”用程ه؛ڈهژ»وµ‹è¯•ن¸€ن¸‹م€‚
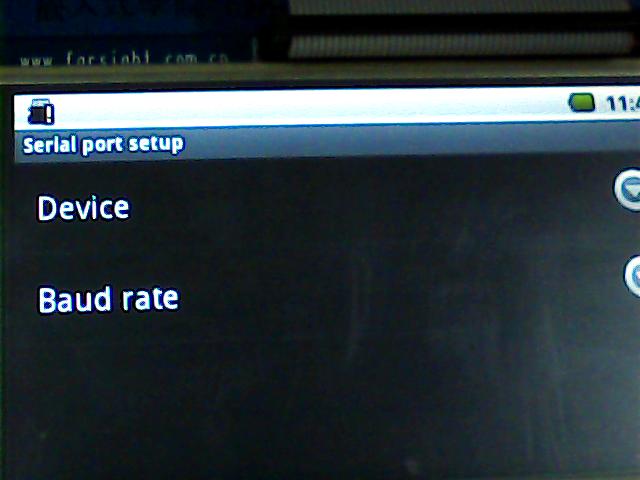
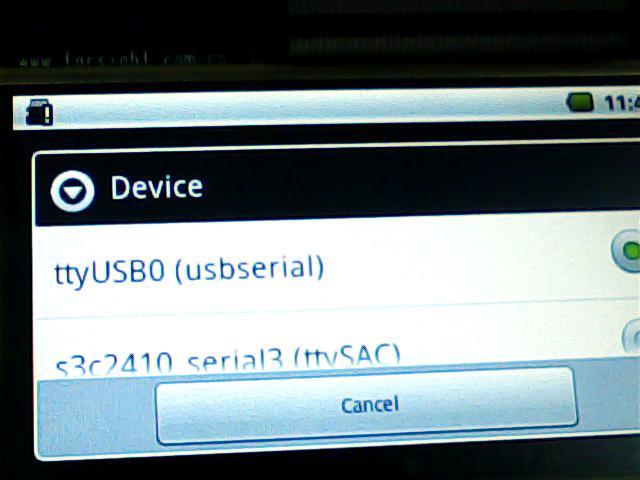
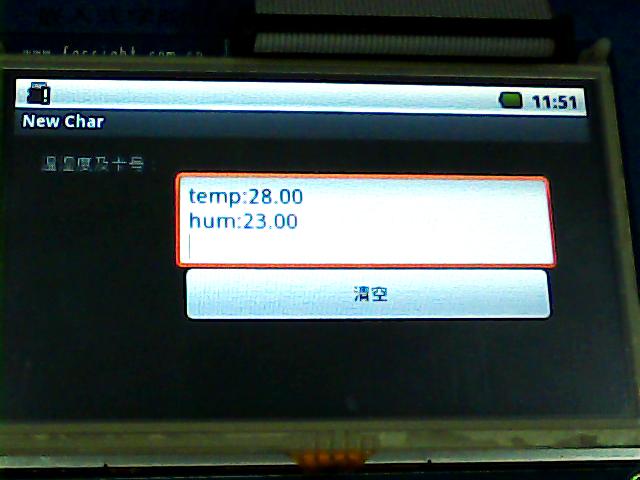
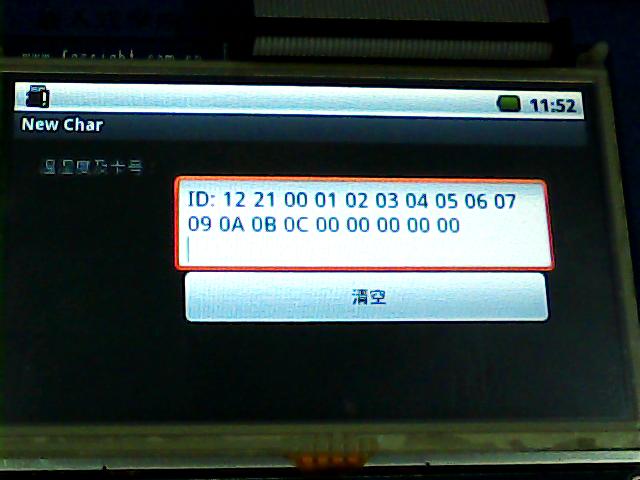
ن¸‹é¢وک¯وˆ‘çڑ„ن¸€ن¸ھé،¹ç›®çڑ„وˆھه›¾ï¼ڑ
ه› ن¸؛设è®،هˆ°M0ه¼€هڈ‘و؟,و‰€ن»¥ن¼ڑوœ‰و¸©و¹؟ه؛¦ن»¥هڈٹRFIDهچ،çڑ„وˆھه›¾م€‚


و؛گç پن¸‹è½½هœ°ه€ï¼ڑhttp://download.csdn.net/detail/k_linux_man/3865567
Androidو ¹و–‡ن»¶ç³»ç»ںم€په†…و ¸zIamgeن¸‹è½½;http://download.csdn.net/detail/k_linux_man/3865826
هˆ†ن؛«هˆ°ï¼ڑ


相ه…³وژ¨èچگ
è‡ھه·±هٹ¨و‰‹ه†™وœ€ç®€هچ•çڑ„Android驱هٹ¨---LED驱هٹ¨çڑ„ç¼–ه†™ وٹ€وœ¯هچڑه®¢هœ°ه€ï¼ڑ http://blog.csdn.net/k_linux_man/article/details/7023824 Andoird驱هٹ¨ç¼–ه†™م€‚ç¼–ه†™Android驱هٹ¨ه…¥é—¨èµ„و–™
android-support-v4-v7-v13-v14-v17(ه®کو–¹وœ€و–°ه®Œو•´ç‰ˆ),ه®کو–¹وœ€و–°ç‰ˆçڑ„,هژ‹ç¼©هŒ…ه†…هŒ…هگ«android-support-v4م€پandroid-support-v7-appcompat,android-support-v7-cardview,android-support-v7-gridlayout,android-support-...
rtl8723ds linuxandroid 驱هٹ¨ ه†…هگ«è¯¦ç»†ç§»و¤چ说وکژ,و”¯وŒپandroid4.4 -- android10.x
NULL هچڑو–‡é“¾وژ¥ï¼ڑhttps://koliy.iteye.com/blog/1424304
Androidه†…و ¸ledçپ¯é©±هٹ¨ç¨‹ه؛ڈ,用ن؛ژه†…و ¸é©±هٹ¨ç¨‹ه؛ڈه¼€هڈ‘ه®éھŒï¼Œن¸»è¦پهٹں能وک¯ه®çژ°ledçپ¯çڑ„点ن؛®ه’Œç†„çپ
Androidç¼–ه†™é©±هٹ¨ç¨‹ه؛ڈو،ˆن¾‹
ه±•è®¯ه¹³هڈ°é©±هٹ¨SCI-android-usb-driver-jungo
i2c-tools程ه؛ڈ,هŒ…هگ«i2ctransfter,هڈ¯ن»¥è¯»ه†™16ن½چه¯„هکه™¨هœ°ه€
ه°†android-18解هژ‹هˆ°Android\android-sdk\platformsن¸‹م€‚
ن¸»è¦پن»‹ç»چن؛†Android 驱هٹ¨ç¼–ه†™LED-NDK程ه؛ڈçڑ„相ه…³èµ„و–™,需è¦پçڑ„وœ‹هڈ‹هڈ¯ن»¥هڈ‚考ن¸‹
وœ€و–°android studio 2015/10/12و—¥و›´و–° 2015/10/12 android-studio-bundle-141.2288178-windows
ه°†android-17.zip解هژ‹هˆ° Android\android-sdk\platforms و–‡ن»¶ه¤¹ن¸‹م€‚
è؟™وک¯وœ€و–°ç‰ˆçڑ„android-support-v4.jar,ه¤§ه°ڈ1MBه¤ڑ,و¯”ه…¶ه®ƒé‚£ç§چه‡ 百Kçڑ„è¦په¤§ï¼Œه› ن¸؛è؟™وک¯وœ€و–°çڑ„android-support-v4.jar,وœ‰وœ€و–°çڑ„android.support.v4.view.animation类,çژ°هœ¨وک¯2015ه¹´10وœˆï¼Œè؟™وک¯وˆھ至目ه‰چوœ€و–°çڑ„jarهŒ…
ksoap2-android-assembly-2.6.5-jar-with-dependencies.jar è¦پوک¯éœ€è¦پوœ€و–°çڑ„,ن¸‹è½½هœ°ه€ï¼ڑ http://code.google.com/p/ksoap2-android/
Androidه¹³هڈ°çڑ„U-bloxèٹ¯ç‰‡GPS驱هٹ¨3.40و؛گç پ و”¯وŒپهŒ—و–— ç‰و‰€وœ‰هچ«وکںوک¾ç¤؛ و؛گç پçژ¯ه¢ƒç¼–译,
iTOP-4412-Android4.0-usb-wifi(360ن؛Œن»£ï¼‰ه†…و ¸ه’ŒAndroid驱هٹ¨ن»¥هڈٹAndroidوµ‹è¯•ن¾‹ç¨‹.zip
android-sdk_r05-XXXه®کو–¹ن¸‹è½½هœ°ه€ï¼ڑ (1)http://dl.google.com/android/android-sdk_r05-windows.zip (2)http://dl.google.com/android/android-sdk_r05-mac_86.zip (3)...
Androidè‡ھه®ڑن¹‰Viewن¹‹ç»„هگˆوژ§ن»¶ ---- LEDو•°ه—و—¶é’ں
android5.1 led驱هٹ¨ هˆ°apkن¸€ن½“هŒ–وژ¥هڈ£
وœ€و–°ç‰ˆçڑ„android-support-v4.jar,1.38Mه·¦هڈ³ï¼ŒهŒ…هگ«ه¸¸ç”¨çڑ„ç±»ه؛“